在Android开发中,我们经常会需要在Android界面上弹出一些对话框,比如询问用户或者让用户选择。这些功能我们叫它Android Dialog对话框,在我们使用Android的过程中,我归纳了一下,Android Dialog的类型无非也就7种,下面我分别向大家介绍这7种Android Dialog对话框的使用方法,希望对大家能有所帮助。
1.该效果是当按返回按钮时弹出一个提示,来确保无误操作,采用常见的对话框样式。
创建dialog对话框方法代码如下:
protected void dialog() {
    AlertDialog.Builder builder = new Builder(Main.this);
    builder.setMessage("确认退出吗?");
    builder.setTitle("提示");
    builder.setPositiveButton("确认", new OnClickListener() {
     @Override
     public void onClick(DialogInterface dialog, int which) {
      dialog.dismiss();
      Main.this.finish();
     }
    });
    builder.setNegativeButton("取消", new OnClickListener() {
     @Override
     public void onClick(DialogInterface dialog, int which) {
      dialog.dismiss();
     }
    });
    builder.create().show();
   }
在onKeyDown(int keyCode, KeyEvent event)方法中调用此方法
public boolean onKeyDown(int keyCode, KeyEvent event) {
    if (keyCode == KeyEvent.KEYCODE_BACK && event.getRepeatCount() == 0) {
     dialog();
    }
    return false;
   }
2.改变了对话框的图表,添加了三个按钮
创建dialog的方法代码如下:
Dialog dialog = new AlertDialog.Builder(this).setIcon(
       android.R.drawable.btn_star).setTitle("喜好调查").setMessage(
       "你喜欢李连杰的电影吗?").setPositiveButton("很喜欢",
       new OnClickListener() {
        @Override
        public void onClick(DialogInterface dialog, int which) {
         // TODO Auto-generated method stub
         Toast.makeText(Main.this, "我很喜欢他的电影。",
           Toast.LENGTH_LONG).show();
        }
       }).setNegativeButton("不喜欢", new OnClickListener() {
      @Override
      public void onClick(DialogInterface dialog, int which) {
       // TODO Auto-generated method stub
       Toast.makeText(Main.this, "我不喜欢他的电影。", Toast.LENGTH_LONG)
         .show();
      }
     }).setNeutralButton("一般", new OnClickListener() {
      @Override
      public void onClick(DialogInterface dialog, int which) {
       // TODO Auto-generated method stub
       Toast.makeText(Main.this, "谈不上喜欢不喜欢。", Toast.LENGTH_LONG)
         .show();
      }
     }).create();
     dialog.show();
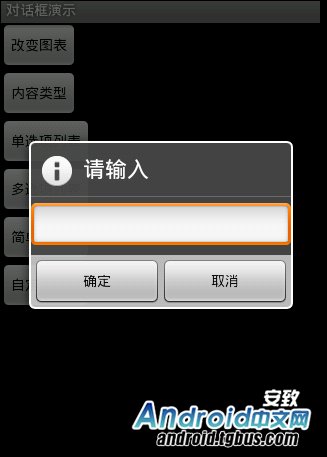
3.信息内容是一个简单的View类型
创建dialog方法的代码如下:
new AlertDialog.Builder(this).setTitle("请输入").setIcon(
       android.R.drawable.ic_dialog_info).setView(
       new EditText(this)).setPositiveButton("确定", null)
       .setNegativeButton("取消", null).show();
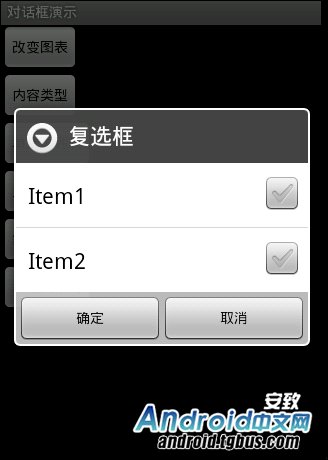
4.信息内容是一组单选框
创建dialog方法的代码如下:
new AlertDialog.Builder(this).setTitle("复选框").setMultiChoiceItems(
       new String[] { "Item1", "Item2" }, null, null)
       .setPositiveButton("确定", null)
       .setNegativeButton("取消", null).show();
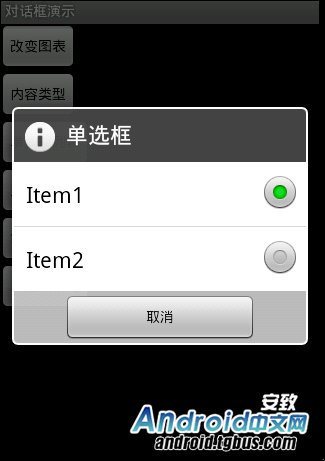
5.信息内容是一组多选框
创建dialog方法的代码如下:
new AlertDialog.Builder(this).setTitle("单选框").setIcon(
       android.R.drawable.ic_dialog_info).setSingleChoiceItems(
       new String[] { "Item1", "Item2" }, 0,
       new DialogInterface.OnClickListener() {
        public void onClick(DialogInterface dialog, int which) {
         dialog.dismiss();
        }
       }).setNegativeButton("取消", null).show();
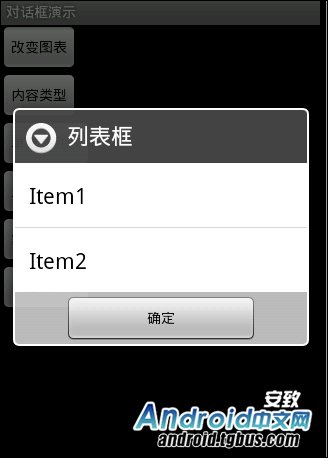
6.信息内容是一组简单列表项
创建dialog的方法代码如下:
new AlertDialog.Builder(this).setTitle("列表框").setItems(
       new String[] { "Item1", "Item2" }, null).setNegativeButton(
       "确定", null).show();
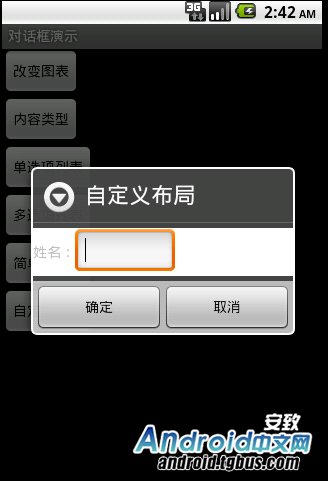
7.信息内容是一个自定义的布局
dialog布局文件代码如下:
创建dialog方法的代码如下:
LayoutInflater inflater = getLayoutInflater();
     View layout = inflater.inflate(R.layout.dialog,
       (ViewGroup) findViewById(R.id.dialog));
     new AlertDialog.Builder(this).setTitle("自定义布局").setView(layout)
       .setPositiveButton("确定", null)
       .setNegativeButton("取消", null).show();
好了,以上7种Android dialog对话框的使用方法就介绍到这里了,基本都全了,如果大家在android开发过程中遇到dialog的时候就可以拿出来看看。
另外注,本文参考文章:
http://android.tgbus.com/Android/tutorial/201107/359812.shtml